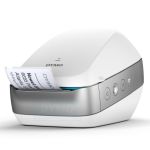
The first time you connect to the LabelWriter Wireless printer, a Quick Setup wizard guides you through the connection process. You can re-run this Quick Setup wizard at any time from the menu to connect to a different network. You can also skip the Quick Setup wizard and configure the printer for a network.
Information
Determine the wireless connection method to use to connect the printer to your wireless network. Refer to the documentation that came with your router or access point to determine the connection methods supported.
You can quickly connect the printer to your wireless network in several ways:
using the Wireless Protected Setup (WPS) button
using the Quick Setup wizard in the LabelWriter Web Configuration utility installed on the printer
Some router models support WPS but require a pin code.
To connect using a WPS pin code
Log in to the Web Configuration utility. See Accessing the Web Configuration Utility on page 15.
From the menu, click WPS.
Click Get pin code. A unique 8-digit pin code displays, the wireless status light will blink, and a two minute count down begins showing the time you have to connect the printer to your router.
Enter the pin code in your router’s settings within the time left to connect. Refer to your router’s documentation for where to enter the pin code.
Your label printer works with DYMO Label v.8 software to make designing and printing labels easy. You can also print labels directly from the desktop with QuickPrint, and from Microsoft Word, Excel, Outlook, ACT! (US only), and QuickBooks (US only) with DYMO Label Add-ins. The Add-ins are automatically installed when you install DYMO Label v.8 software if you have the applications above installed on your computer. See the DYMO Label v.8 online Help or Software User Guide for more information on using these features.
Become familiar with the location of the feature and function keys on your label maker. Refer to Figure 1. The following sections describe each feature in detail.
In the original packaging, the shelf life for LabelWriter labels is 18 months. When labels are used for short-term applications (envelopes, packages, and so on), fading is not a problem. When labels are used to label files in a file cabinet, fading is very gradual over many years. Labels applied to the edge of a notebook that is then placed on a shelf in the sun will show signs of fading within a few months.
Inaccurate handling of a Lithium-ion rechargeable battery may cause leakage, heat, smoke, an explosion, or fire. This
could cause deterioration of performance or failure. This may also damage the protection device installed in the battery
pack. This could damage equipment or injure users. Thoroughly follow the instructions below.
With the DYMO® LabelManager® 280 electronic label maker, you can create a wide variety of high-quality, self-adhesive labels. You can choose to print your labels in several different fonts, text sizes, and text styles. The label maker uses DYMO D1 label cassettes in widths of 6 mm, 9 mm, or 12 mm. These label cassettes are available in a wide range of colours.
WPS Button
The Wi-Fi Protected Setup (WPS) button can be used to connect the printer to your WPS-enabled router. You have two minutes to press both the WPS button on your router and on the printer.
For information about whether your router supports WPS, refer to the documentation that came with your router.
RESET
Pressing the RESET button for longer than five seconds returns the printer to the factory default settings. This will delete any network or other settings you may have saved.
Visit www.dymo.com/register to register your label printer online. During the registration process, you will need the serial number, which is located on the bottom of the label printer.
While some of the items on this page can be purchased from our website, some of the other links on this page may be affiliate links. If you make a purchase through these links, we may earn a (very) small commission at no extra cost to you.


